|
|
Government Services Infrastructure - GSi |
|
3. Running the GSi Administrator Tool 6. Managed and Unmanaged Vertical 8.1.2. Creating a New Processes 8.1.4. Deploy and Un-deploy Processes 8.2.2. Creating a New Activity 8.3.1. View Process Permissions 8.3.2. Create a New Process Permission 8.3.3. Delete Process Permission 9.1.1. View Time Based Processes 9.1.2. Create a new Time Based Processes 9.1.3. Modify Time Based Processes 9.1.4. Delete Time Based Processes 1. OverviewThis document explains in detail to work with the GSi Administrator Tool. This document will help the reader understand and learn ﺓ Creating Verticals ﺓ Managing User Profiles for GSi and Verticals. ﺓ Managing Process and Activities for GSi and Verticals. ﺓ Time Based Process Management. 2. IntroductionThe GSi Administrator Tool is a Web Based application. This tool is used to manage the GSi and Verticals User profiles, Processes and Activities. It is also used to manage the Time Based Processes. The super user for the GSi
Administrator Tool is the GSi Admin User. The GSi and Verticals
functionalities can be managed by this user. The Vertical Admin User can manage
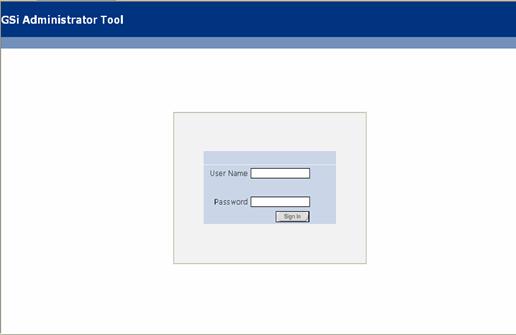
that Vertical functionality only. 3. Running the GSi Administrator ToolThe GSi Administrator Tool can be run by any Internet Browser. The GSi Administrator Tool to get connected, the URL should be pointing to the GSi Server Location. Below is the URL format to get connected. http://<GSiServerLocation>:<Port>/GSiAdmin/ 4. Getting Started4.1. LoginTo login into the GSi Administrator Tool, the user should have admin role. The GSi Admin or Vertical Admin can login. Below is a screen shot of the Login Screen [Figure 1.0].
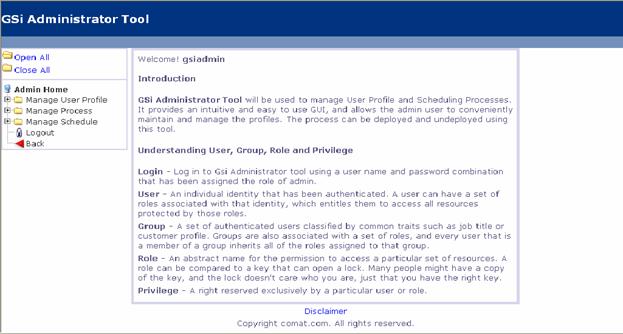
Figure 1.0 4.2. Main MenuOnce the User is validated and logged in, the user gets into the Main Menu which is shown as in the below [figure 1.1].
Figure 1.1 The Main Menu screen has a left menu which has: ﺓ Open All / Close All: Open All is used to open all the nodes and Close All is used to close all the opened nodes. ﺓ Manage User Profile: This node contains the GSi and Verticals User Profile Information. ﺓ Manage Process: This node contains the GSi and Verticals Processes, Activities and Process Permissions. ﺓ Manage Schedule: This node contains the GSi and Verticals Processes Time Based and Cron Jobs. 5. GSi and VerticalIn the GSi Administrator Tool, GSi
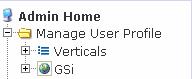
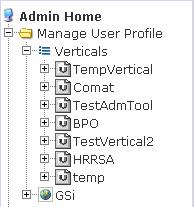
is the core and the Vertical is the application running on the GSi. 6. Managed and Unmanaged VerticalManaged Vertical: The User Profile data is with the GSi database and relationships are managed using the GSi Administrator Tool. Unmanaged Vertical: The User Profile data is not with the GSi database and the relationships are not managed by the GSi Administrator Tool. 6.1. Create a New VerticalTo create a new vertical the user must be a GSi Admin. The below is a figure [figure 2.0] which shows the Manage User Profile which contains the Vertical and GSi nodes. The user will have to click on the Verticals Node and then will get a next screen to add the vertical.
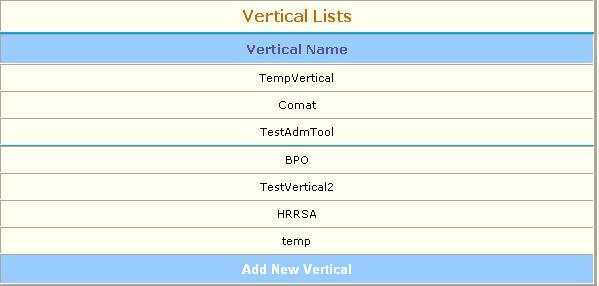
Figure 2.0 The Next screen is the List of Verticals and there is a link below to add a New Vertical. Below is the figure that lists the verticals [Figure 2.1]
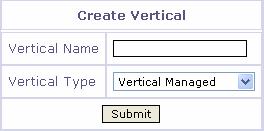
Figure 2.1 Below is the screen to enter the vertical name the type of the vertical to choose. Shown in [figure 2.2].
Figure 2.2 Once the details of the vertical is submitted then will get added in the vertical list as shown below. Shown in [figure 2.3].
Figure 2.3 7. User Profile ManagementUser Profile Management consists of
all the User functionalities. The performers of the User Profile Management in
GSi Administrator Tool will have to be an Admin user for that Vertical or GSi. 7.1. USERThe User functionality in the GSi
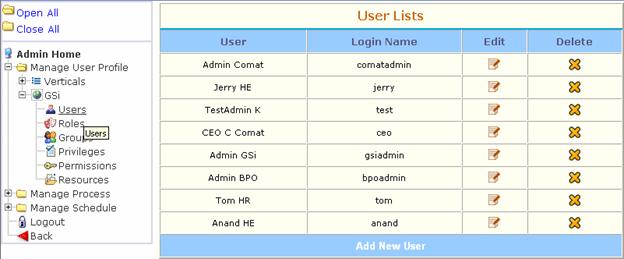
Administrator Tool is placed under the Manage User Profile Node. 7.1.1. Who is a User?ﺓ A Person. ﺓ Can belong to a Group or many Groups. ﺓ Can have a Role or multiple Roles. 7.1.2. Viewing UsersTo view the Users, click on the appropriate vertical Users or GSi users label. As shown in the below [Figure 2.4]
Figure
2.4 7.1.3. Add a new UserTo add a new User, the admin will
have to click on the Add New User below in the User Lists page as shown
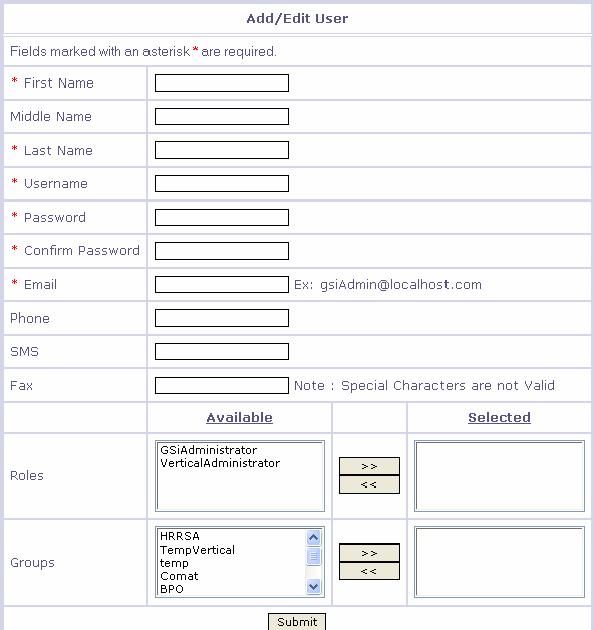
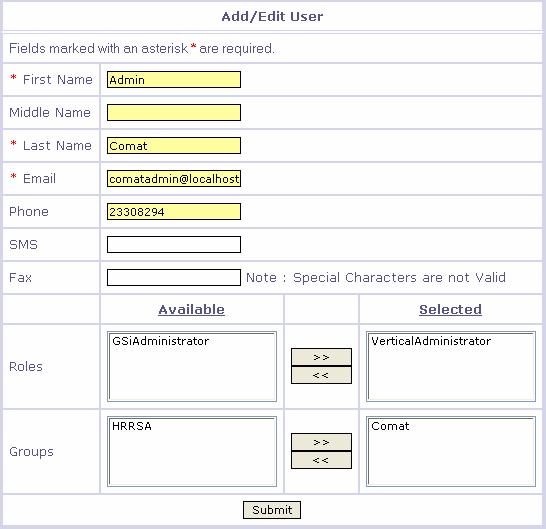
in figure [Figure 2.4]. The Admin gets the screen to add the user details as shown in the below figure [Figure 2.5]
Figure 2.5
The User Details
can be entered in the page as shown above. The red asterisk fields are
mandatory for the User. The Roles and Groups can be added or removed using the
list box as shown in the above figure. 7.1.4. Modify a UserTo modify a User, the admin will
have to click on the Edit icon in the User Lists page as shown in figure
[Figure 2.4]. The Admin gets the screen to edit the user details as shown in the below figure [Figure 2.6]
Figure 2.6 7.1.5. Delete a UserTo delete a User, the admin will
have to click on the Delete icon in the User Lists page as shown in
figure [Figure 2.4]. 7.2. GROUPThe Group functionality in the GSi
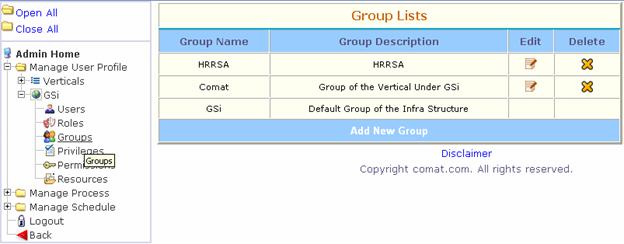
Administrator Tool is placed under the Manage User Profile Node. 7.2.1. What is a Group?ﺓ Is a Unit related to GSi or Vertical. ﺓ A group can have many sub-groups. 7.2.2. Viewing GroupsTo view the Groups, click on the appropriate vertical Groups or GSi groups label. As shown in the below [Figure 2.7]
Figure
2.7 7.2.3. Add a new GroupTo add a new Group, the admin will
have to click on the Add New Group below in the Group Lists page as
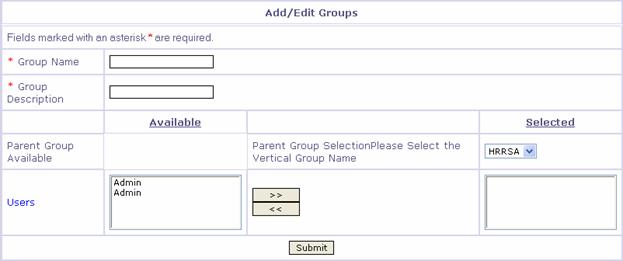
shown in figure [Figure 2.7]. The Admin gets the screen to add the group details as shown in the below figure [Figure 2.8]
Figure 2.8 The Group
Details can be entered in the page as shown above. The red asterisk fields are
mandatory for the Group. The users can be added to the group by selecting the
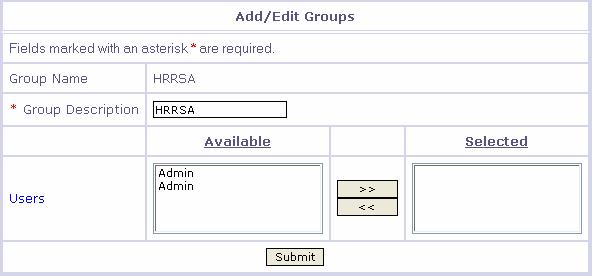
users from the list box. 7.2.4. Modify a GroupTo modify a Group, the admin will have to click on the Edit icon in the Group Lists page as shown in figure [Figure 2.7] The Admin gets the screen to edit the user details as shown in the below figure [Figure 2.9]
Figure
2.9 7.2.5. Delete a GroupTo delete a Group, the admin will
have to click on the Delete icon in the Group Lists page as shown in
figure [Figure 2.7]. 7.3. ROLEThe Role functionality in the GSi
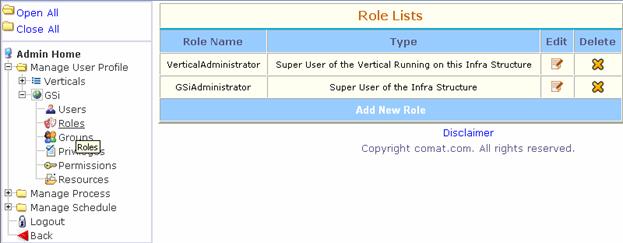
Administrator Tool is placed under the Manage User Profile Node. 7.3.1. What is a Role?ﺓ The actions and activities assigned to or required or expected of a User. 7.3.2. Viewing RolesTo view the Roles, click on the appropriate vertical Roles or GSi roles label. As shown in the below [Figure 2.10]
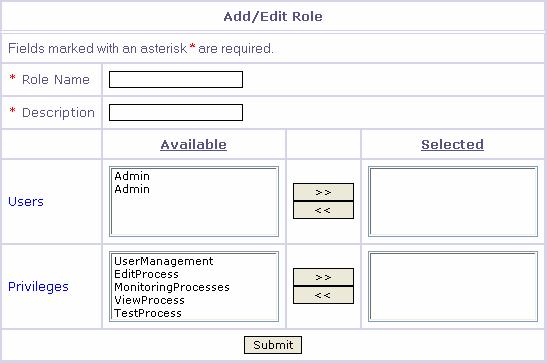
Figure 2.10 7.3.3. Add a new RoleTo add a new Role, the admin will have to click on the Add New Role below in the Role Lists page as shown in figure [Figure 2.10]. The Admin gets the screen to add the role details as shown in the below figure [Figure 2.11] The Role Details can be entered
in the page as shown in the below figure [Figure 2.11]. The red asterisk fields
are mandatory for the Role. The users and privileges can be added to the role
by selecting the appropriate values from the list box.
Figure
2.11 7.3.4. Modify a RoleTo modify a Role, the admin will have to click on the Edit icon in the Role Lists page as shown in figure [Figure 2.10] The Admin gets the screen to edit the role details as shown in the figure [Figure 2.11]. The screen is same for the adding new role and editing. 7.3.5. Delete a RoleTo delete a Role, the admin will
have to click on the Delete icon in the Role Lists page as shown in
figure [Figure 2.10]. 7.4. PRIVILEGEThe Privilege functionality in the
GSi Administrator Tool is placed under the Manage User Profile Node. 7.4.1. What is a Privilege?ﺓ A right reserved exclusively by a particular Role. ﺓ Privilege consists of Permission and Resource. 7.4.2. Viewing PrivilegeTo view the Privileges, click on the appropriate vertical Privilege or GSi privileges label. As shown in the below [Figure 2.12]
Figure
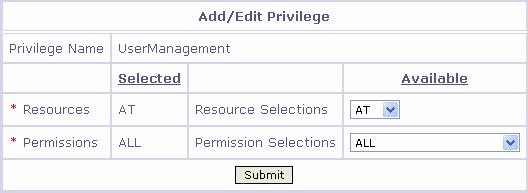
2.12 7.4.3. Add a new PrivilegeTo add a new Privilege, the admin will have to click on the Add New Privilege below in the Privilege Lists page as shown in figure [Figure 2.12]. The Admin gets the screen to add the privilege details as shown in the below figure [Figure 2.13]. The Privilege Details can be
entered in the page as shown in the below figure [Figure 2.13]. The red
asterisk fields are mandatory for the Privilege. The users and privileges can
be added to the role by selecting the appropriate values from the list box.
Figure
2.13 7.4.4. Modify a PrivilegeTo modify a Privilege, the admin will have to click on the Edit icon in the Privilege Lists page as shown in figure [Figure 2.12] The Admin gets the screen to edit the privilege details as shown in the below figure [Figure 2.14]
Figure 2.14 7.4.5. Delete a PrivilegeTo delete a Privilege, the admin
will have to click on the Delete icon in the Privilege Lists page as
shown in figure [Figure 2.12]. 7.5. PERMISSIONThe Permission functionality in
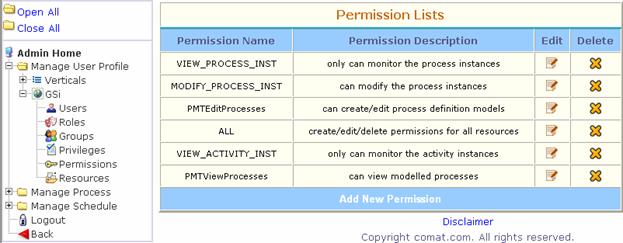
the GSi Administrator Tool is placed under the Manage User Profile Node. 7.5.1. What is Permission?ﺓ Approval to do something. 7.5.2. Viewing PermissionTo view the Privileges, click on the appropriate vertical Privilege or GSi privileges label. As shown in the below [Figure 2.15]
Figure
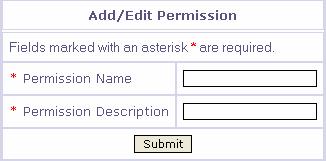
2.15 7.5.3. Add a new PermissionTo add a new Permission, the admin will have to click on the Add New Permission below in the Permission Lists page as shown in figure [Figure 2.15]. The Admin gets the screen to add the permission details as shown in the below figure [Figure 2.16]
Figure
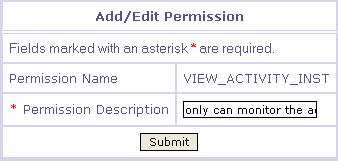
2.16 7.5.4. Modify a PermissionTo modify Permission, the admin will have to click on the Edit icon in the Permission Lists page as shown in figure [Figure 2.15] The Admin gets the screen to edit the permission details as shown in the below figure [Figure 2.17]
Figure
2.17 7.5.5. Delete a PermissionTo delete Permission, the admin
will have to click on the Delete icon in the Permission Lists page as
shown in figure [Figure 2.15]. 7.6. RESOURCEThe Resource functionality in the
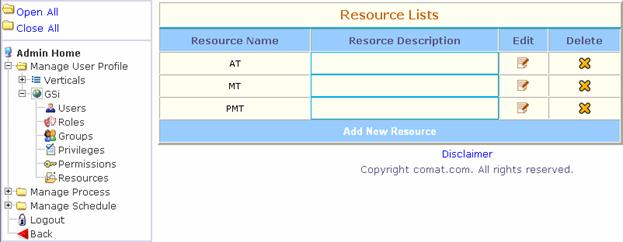
GSi Administrator Tool is placed under the Manage User Profile Node. 7.6.1. What is a Resource?ﺓ This can be a Tool or a source of something to act upon. 7.6.2. Viewing ResourcesTo view the Privileges, click on the appropriate vertical Privilege or GSi privileges label. As shown in the below [Figure 2.18]
Figure
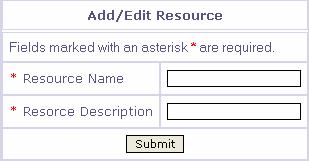
2.18 7.6.3. Add a new ResourceTo add a new Resource, the admin will have to click on the Add New Resource below in the Resource Lists page as shown in figure [Figure 2.18]. The Admin gets the screen to add the resource details as shown in the below figure [Figure 2.19]
Figure
2.19 7.6.4. Modify a ResourceTo modify Resource, the admin will have to click on the Edit icon in the Resource Lists page as shown in figure [Figure 2.18] The Admin gets the screen to edit the resource details as shown in the figure [Figure 2.18]. The screen is same for the adding new resource and editing except the name cannot be changed. 7.6.5. Delete a ResourceTo delete Resource, the admin will
have to click on the Delete icon in the Resource Lists page as shown in
figure [Figure 2.18]. 8. Processes and Activity8.1. ProcessesThe Process functionality in the
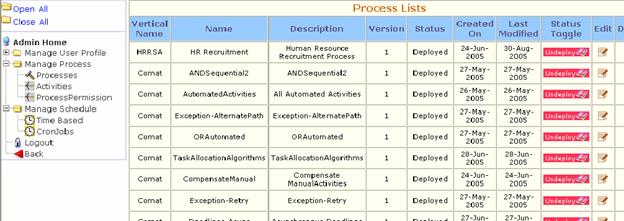
GSi Administrator Tool is placed under the Manage Process Node. 8.1.1. Viewing ProcessesTo view the Processes, click on the Process node under the Manage Process. As shown in the below [Figure 2.19].
Figure
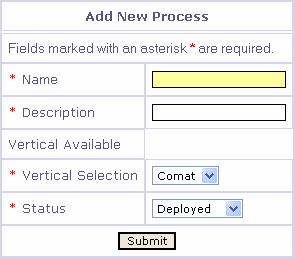
2.19 8.1.2. Creating a New ProcessesTo add a new Process, the admin will have to click on the Add New Process below in the Processes Lists page as shown in figure [Figure 2.19]. The Admin gets the screen to add the process details as shown in the below figure [Figure 2.20]
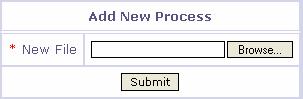
Figure 2.20 The above page will take in all the details of process except the Process XML to upload. The below screen is the next screen after the submission of this screen to upload. As shown in figure [Figure 2.21]
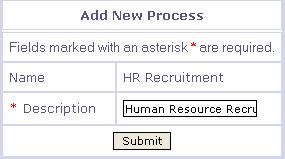
Figure 2.21 8.1.3. Modify ProcessesTo modify Processes, the admin will have to click on the Edit icon in the Processes Lists page as shown in figure [Figure 2.19]. The below figure [figure 2.22] shows the screen to modify the description of the process.
Figure 2.22 8.1.4. Deploy and Un-deploy ProcessesThe Deploy and Un-deploy of the
processes can be done using the toggle status icon as shown in figure [Figure
2.19]. 8.1.5. Delete ProcessesTo delete Processes, the admin
will have to click on the Delete icon in the Processes Lists page as
shown in figure [Figure 2.19]. 8.2. ActivityThe Activity functionality in the
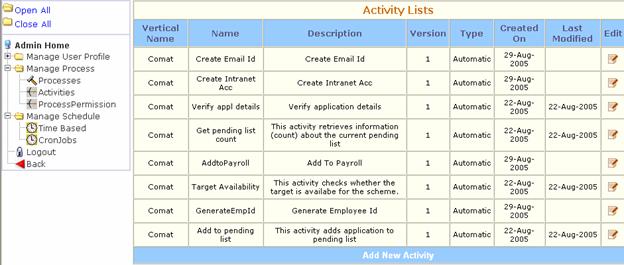
GSi Administrator Tool is placed under the Manage Process Node. 8.2.1. Viewing an ActivityTo view the Activities, click on the Activity node under the Manage Process. As shown in the below [Figure 2.23].
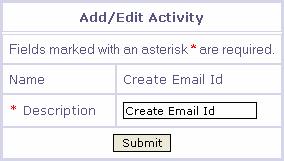
Figure 2.23 8.2.2. Creating a New ActivityTo add a new Activity, the admin will have to click on the Add New Activity below in the Activity Lists page as shown in figure [Figure 2.23]. The Admin gets the screen to add the activity details as shown in the below figure [Figure 2.24]
Figure 2.24 The above page will take in all the details of activity except the Activity XML to upload. The below screen is the next screen after the submission of this screen to upload. As shown in figure [Figure 2.25]
Figure 2.25 8.2.3. Modifying an ActivityTo modify Activity, the admin will have to click on the Edit icon in the Activity Lists page as shown in figure [Figure 2.23]. The below figure [figure 2.26] shows the screen to modify the description of the activity.
Figure 2.26 8.2.4. Deleting an ActivityTo delete Activity, the admin will
have to click on the Delete icon in the Activities Lists page as shown
in figure [Figure 2.23]. 8.3. Process PermissionThe Process Permission
functionality in the GSi Administrator Tool is placed under the Manage Process
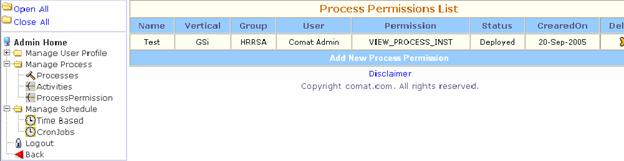
Node. 8.3.1. View Process PermissionsTo view the Process Permissions, click on the Process Permission node under the Manage Process. As shown in the below [Figure 2.27].
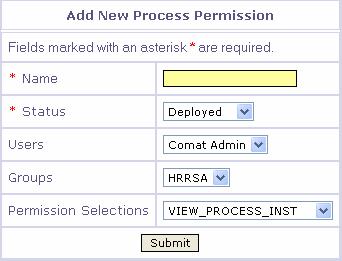
Figure 2.27 8.3.2. Create a New Process PermissionTo add a new Process Permission, the admin will have to click on the Add New Process Permission below in the Process permission Lists page as shown in figure [Figure 2.27]. The Admin gets the screen to add the vertical selection for the process permission as shown in the below figure [Figure 2.28]
Figure 2.28 The above vertical selection should be done to add the process permission details. The Admin gets the screen to add the process permission details as shown in the below figure [Figure 2.29].
Figure
2.29 8.3.3. Delete Process PermissionTo delete Process Permission, the
admin will have to click on the Delete icon in the Process Permissions
Lists page as shown in figure [Figure 2.27]. 9. Time Based Processes9.1. Time Based ScheduleThe Time Based Schedule
functionality in the GSi Administrator Tool is placed under the Manage Schedule
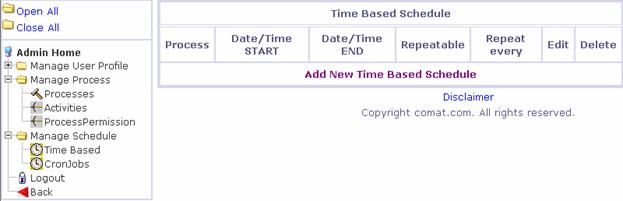
Node. 9.1.1. View Time Based ProcessesTo view the Time Based Schedule, click on the Time Based Schedule node under the Manage Schedule. As shown in the below [Figure 2.30].
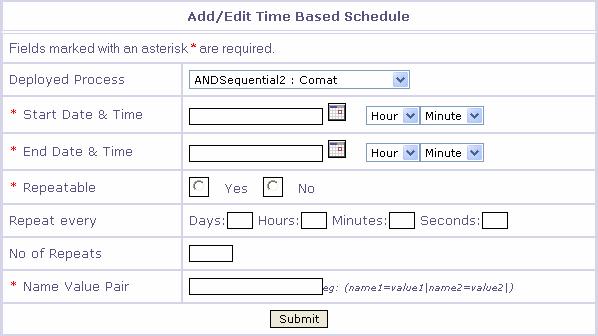
Figure 2.30 9.1.2. Create a new Time Based ProcessesTo add a new Time Based Schedule, the admin will have to click on the Add New Time Based Schedule below in the Process permission Lists page as shown in figure [Figure 2.30]. The Admin gets the screen to add the Time Based Schedule as shown in the below figure [Figure 2.31]
Figure 2.31 9.1.3. Modify Time Based ProcessesTo modify Time Based Processes, the admin will have to click on the Edit icon in the Time Based Processes Lists page as shown in figure [Figure 2.30]. The same screen as the create is shown for modify also. Except the Deployed Process cannot be changed and as well the start time. 9.1.4. Delete Time Based ProcessesTo delete Time Based Processes,
the admin will have to click on the Delete icon in the Time Based
Processes Lists page as shown in figure [Figure 2.30]. 9.2. Cron JobsThe Cron Jobs functionality in the
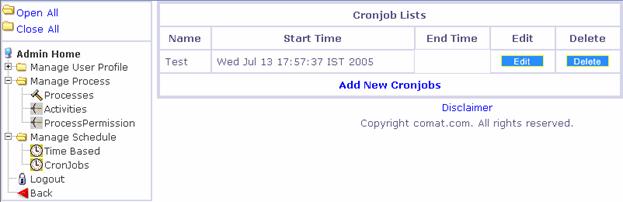
GSi Administrator Tool is placed under the Manage Schedule Node. 9.2.1. View Cron JobsTo view the Cron Job, click on the Cron Job node under the Manage Schedule. As shown in the below [Figure 2.32].
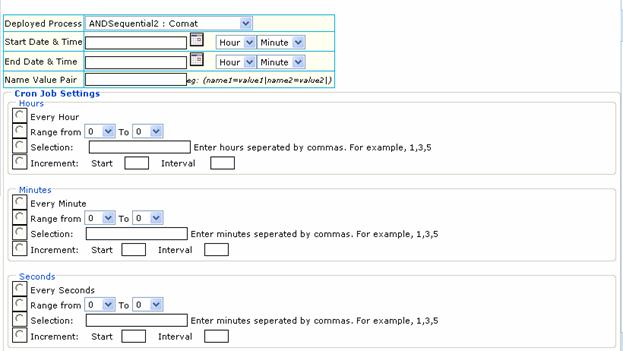
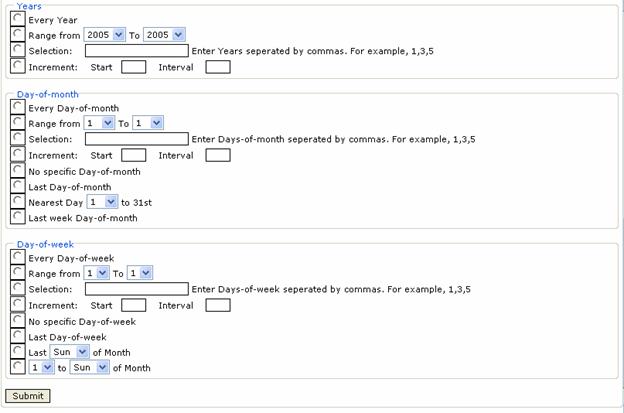
Figure 2.32 9.2.2. Create a new Cron JobTo add a new Cron Job, the admin will have to click on the Add New Cron Job below in the Cron Job Lists page as shown in figure [Figure 2.32]. The Admin gets the screen to add the Cron Job as shown in the below figure [Figure 2.33]
Figure
2.33 9.2.3. Modify a Cron JobTo modify Cron Job, the admin will have to click on the Edit icon in the Cron Job Lists page as shown in figure [Figure 2.32]. The same screen is used for both
create and modify as shown in [Figure 2.33]. 9.2.4. Delete a Cron JobTo delete Cron Job, the admin will
have to click on the Delete icon in the Cron Job Lists page as shown in
figure [Figure 2.32]. |


©2004-2009 Comat Technologies Pvt. Ltd.