|
|
Government Services Infrastructure - GSi |
|
Generate
Vertical Activity Code Select
Process Definition and Destination Structure
of the output generated Manual
Activities with Swing Option Manual
Activities with Web Option Overview
This document explains in detail the functionalities of the GSi Vertical Generator. This document will help the intended users to understand and use the GSi Vertical Generator. Introduction
GSi Vertical Generator is a rapid application
development (RAD) tool which will help in reducing the time required to develop
a vertical. This tool will help in
reducing the time required to develop User Interfaces and Automated activities. The tool
generates user interfaces for manual activities and provides templates for
generation of automated activity code. Features: ·
Stand-alone (Swing) based tool ·
Given the information of the inputs and outputs of a automated activity, automated activity implementation skeleton
code will be generated. ·
Given the information of the inputs and outputs of a
manual activity, screens (Swing / HTML) will be generated and also the code to
send information about the completion of a manual activity will be generated ·
Allow User selection of activities for generation
Getting Started
To install GSi Vertical Generator,
you need to have the JRE 1.4.2 or above to be installed on the machine. Once
the JRE is installed, run the GSi Vertical Generator installer and step thru to
screens to complete the installation. To run GSi Vertical Generator,
This will launch the GSi Vertical
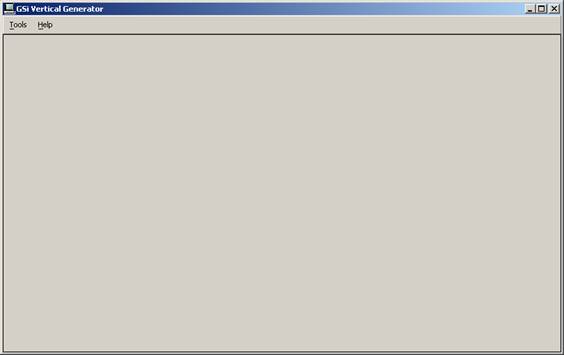
Generator. Main Screen
Main Screen (Figure 1) appears
once the Vertical Generator is started.
Figure 1:Vertical Generator Main Screen Menus
Main
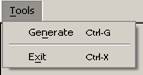
Screen has two menus 1. Tools Menu
(Figure 2) Figure 2:Vertical Generator Tools Menu Tools Menu
has two Menu Items ·
Generate - (Tools -> Generate Ctrl-G)
to Open Generator Dialog (Figure 4) ·
Exit -
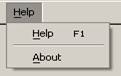
(Tools -> Exit Ctrl-X) to Exit from the GSi Vertical Generator Tool. 2. Help Menu Figure 3:Vertical Generator Help Menu Help Menu has two Menu Items ·
Help - ·
About -(Tools
-> About) to know details of GSi Vertical Generator Generate
Vertical Activity Code
The template based skeleton for
manual and automated activities in a process can be generated using the
Vertical Generator tool. To generate activity code, use the menu and select (Tools
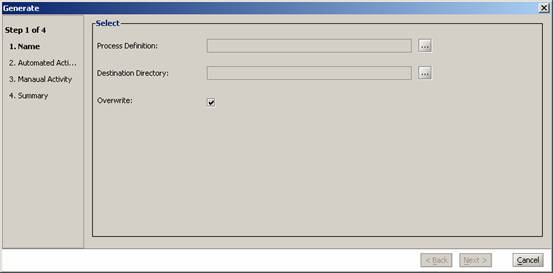
-> Generate Ctrl-G) This launches the generation wizard which has four steps to
generate the Activity Code and User Interface for the selected Process (Process
Definition File (.xml)) Select Process
Definition and Destination
First Step - In this step, specify the process
definition and destination directory where the generated output code needs to
be placed. Select the Process
Definition File and Output Destination Directory. (Figure 4)
Figure 4:First Step Generate Vertical
Process Definition (Figure 5) Figure 5:Process Definition Name Click on
the Ellipse button to get File Chooser and then select the Process definition
(.xml) file. Selected file name will be displayed
in the Process Definition field.
Figure 6:Destination Directory Click on the Ellipse button to get
File Chooser and then select the out put destination directory (where the
generated code will be stored) Selected destination directory name
will be displayed in the Destination directory field.
Figure 7:Overwrite Select if
the existing code can be over written.
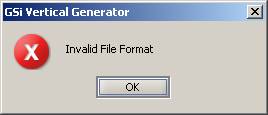
For Invalid file (process definition)
format the following Error message is shown. Select Automated Activities
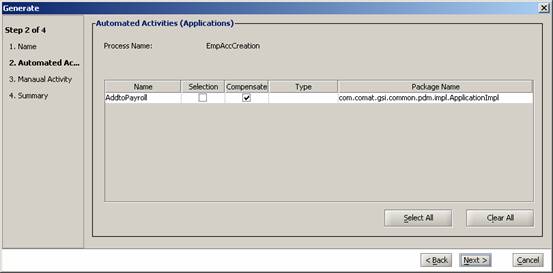
Second
Step - In this step the automated activities
list will be displayed for the Process Definition chosen in First Step.
(Figure 8) This list will be used to select the automated activities
which require code generation.
Figure 8:Second Step Automated Activities selection
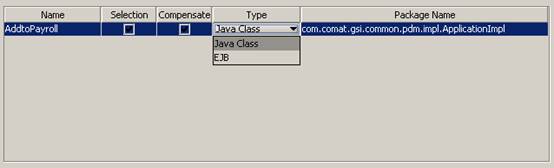
Figure 9:Select Automated Activity
Select Manual
Activities
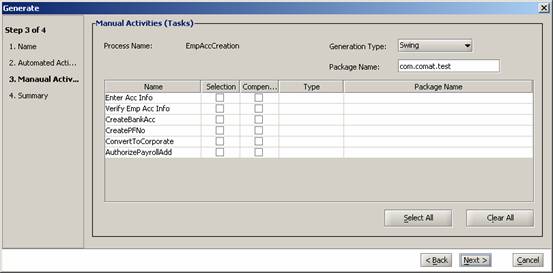
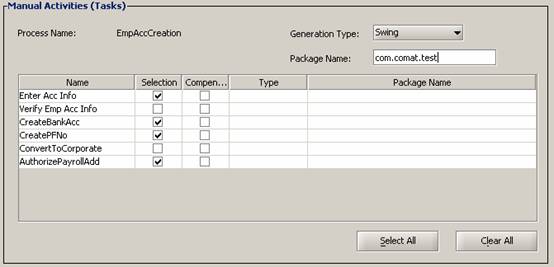
Third
Step - In this step the manual
activities list will be displayed for the Process Definition chosen in First
Step. (Figure 10) This list will be used to select the manual
activities which require UI generation. Along with the manual activity UI’s,
the default task list and processing code will be generated.
Figure 10:Third Step Manual Activity
Figure 11:Selected Manual Activity
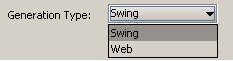
Figure 12:Manual Activity Generation Type
·
Important - At least one Activity (Automated / Manual) should be
selected to generate (go to next step). Summary
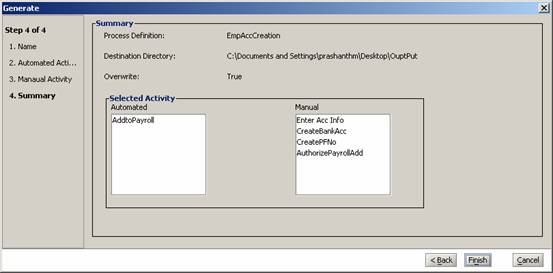
Fourth
Step - This is final step which shows
all the selections made in terms of process definition selected, automated and
manual activities selected for code generation. This essentially shows the summary
of the first three steps. (Figure 13)
Figure 13:Fourth Step Summary Shows the
following ·
Process Definition Name ·
Destination Directory ·
Overwrite status ·
List of selected Automated Activities (Figure 13 Left List) ·
List of selected Manual Activities (Figure 13 Right
List) ·
Click Cancel button to Exit the Generator ·
Click Finish button to Generate Code and User Interface
for selected Activities ·
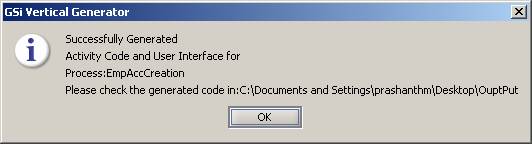
On Success Full Generation of Code and User Interface Figure
14 is shown as user confirmation message. The output generated can be seen
by looking into the destination folder. ·
Else the appropriate Error message is show.
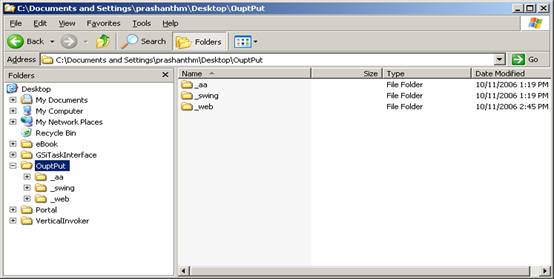
Figure 14:Generate Message Structure of the output generated
This
section explained the structure and contents of the output generated by using
the Generate option. The Figure 15 shows the
screenshot of the output generated folder.
Figure 15:Generated Output
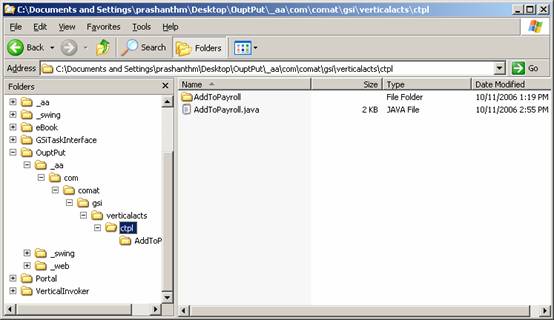
Automated Activity Code
In case of any automated
activities selected for generation, the output is created in the “_aa” folder. This folder will in turn have folder as per the
package structure specified in the automated activity definitions.
Figure 16:Automated Activity Code Structure
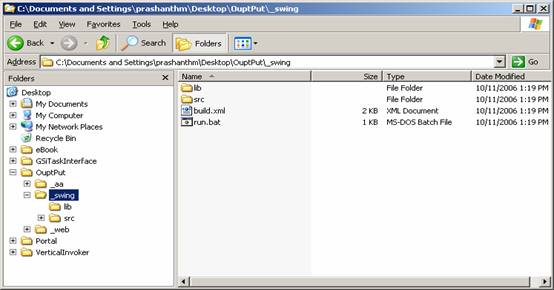
Manual
Activities with Swing Option This
section describes the structure and contents of the code generated for manual
activities with Swing as the UI generation option.
Figure 17:Swing Code Generated Figure 17 shows the Swing
code generated for Manual Activities.
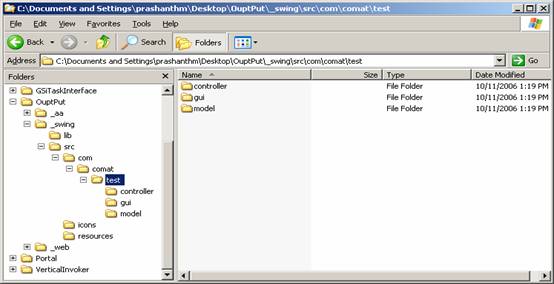
Figure 18:Swing Code Package Structure
Manual
Activities with Web Option
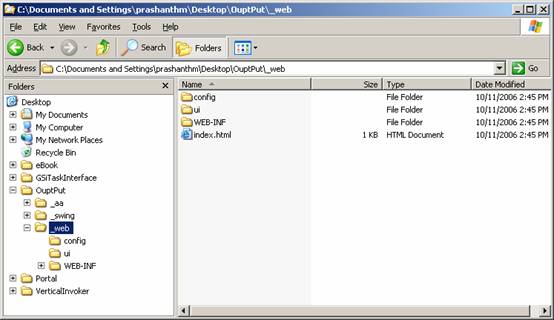
This section describes the
structure and contents of the code generated for manual activities with Web
as the UI generation option. In
case of web generation, the manual tasks related user interfaces and task list
code are auto-generated and is available in the destination folder specified. The Figure 19 shows the directory structure. The
structure is the normal Java based Web Application Archive WAR file based.
Figure 19:Web Application Package Structure The directory
structure is as shown in (Figure 19)
|
©2004-2009 Comat Technologies Pvt. Ltd.